Monday, May 14, 2012

Italian Cream Cake


My mother, of course, read my post in time. She picked out four recipes, and allowed me to choose which one I wanted to make. I chose to make an Italian Creme Cake. This is a recipe that we have seen for years in Cooking Light magazine and have always wanted to try. It was delicious, to say the least. If you asked me what flavor it was, I couldn't really tell you. It has a very complex, creamy flavor that I believe can be credited to the coconut extract. Coconut haters, do not be afraid! This cake does not taste like coconut, it just adds a creamy depth of flavor.


So here it is, the glorious Italian Creme Cake!


Combine sugar and butter, mix at medium speed until well blended.


Add egg yolks, one at a time. Beating well after each addition.

Okay, I forgot to take a picture of the flour and baking soda that was mixed together in a medium bowl, but you should mix the flour and baking soda together in a medium bowl before this next step. I highly recommend using a whisk.

Now, add the flour mixture and buttermilk to the butter mixture alternately, beginning and ending with the flour. So basically, add some flour...

...and then some buttermilk. Repeat until you have used all of the buttermilk and flour mixture. It's a pretty basic concept!
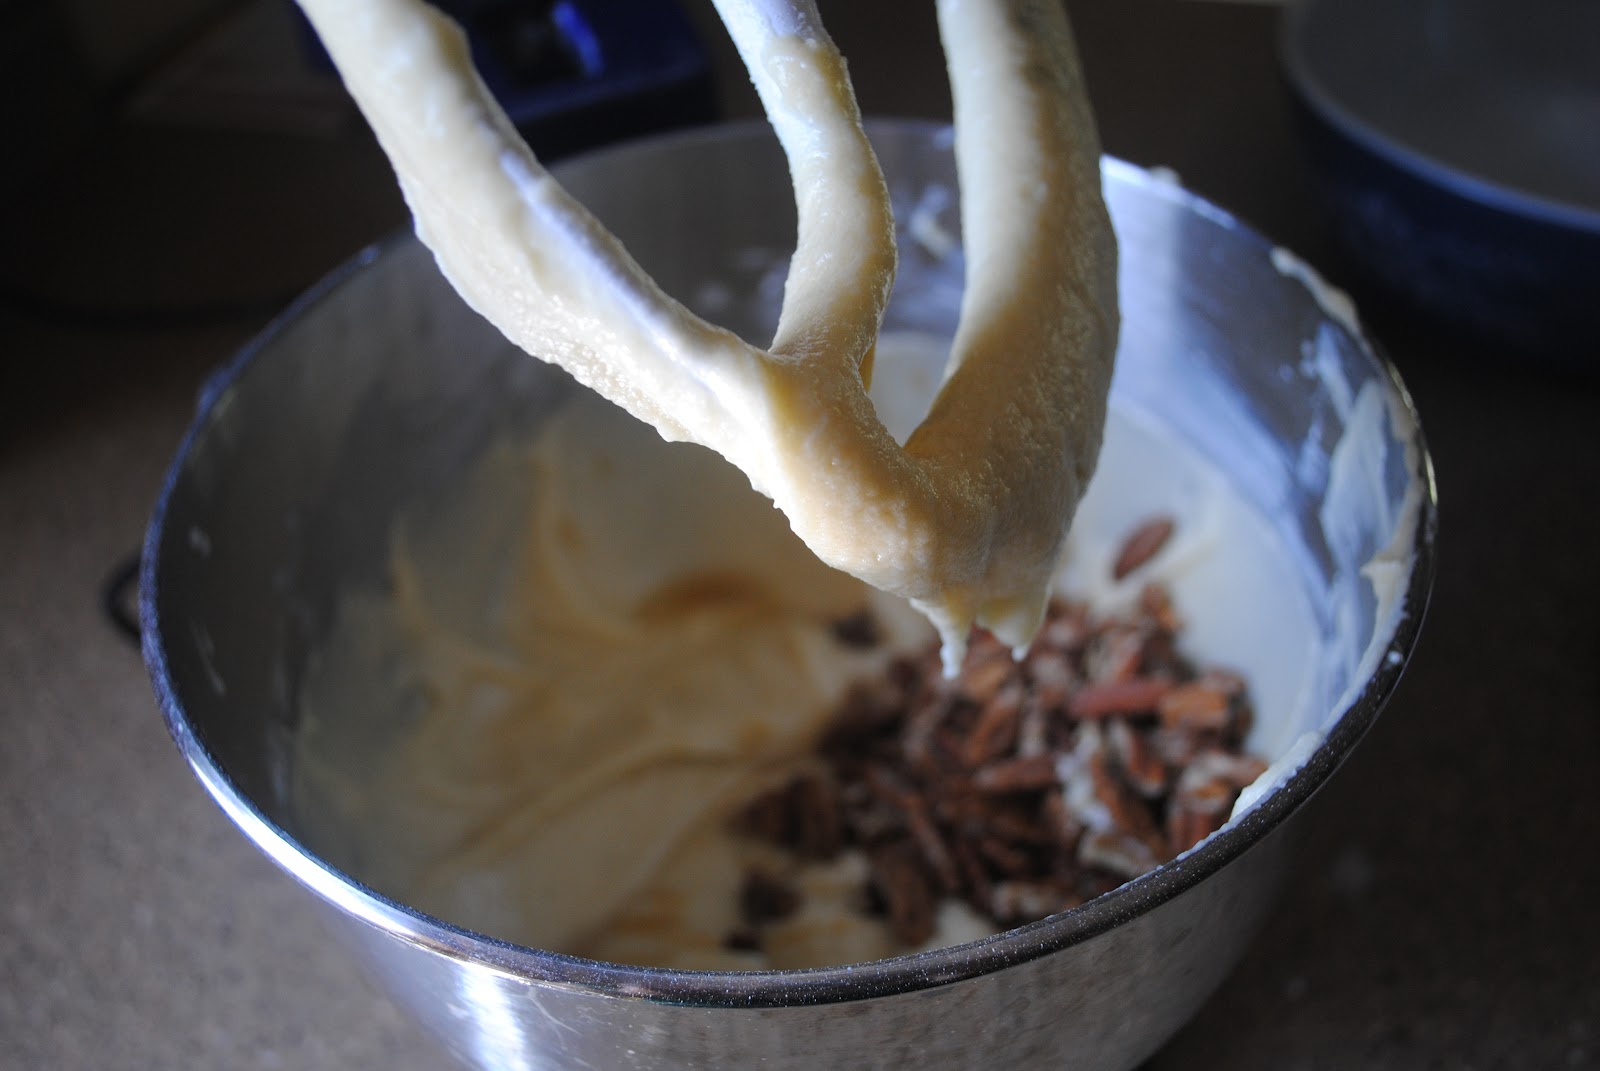
Next, add the extracts (butter, coconut, vanilla) and the pecans. Stir until combined.

Alrighty, so here's where it gets interesting...at least for me it did! Next you need to beat the egg whites until you have stiff peaks. Not so tough if you have a mixer to use. In the interest of not doing dishes more than I had to, I was planning on using the hand mixer. However, my mom loaned it to her friend. Not to worry! I have muscles, and I know how to use them! (I never said they were big muscles, you can stop laughing now.)

So yes, I beat the egg whites by hand.
(Oh, there's Molly looking for spills --Hi Molly!)


Ta-da! Stiff peaks!


Yes, I am proud!


Now, take all of those beautifully beaten egg whites, and fold them into the batter. I apparently forgot to document this important step!

Pour the batter into prepared pans (sprayed with cooking spray, a layer of parchment, and  more cooking spray). The recipe calls for you to use 3 pans. I, unfortunately, only have 2. So I just used 2 and adjusted the cooking time a bit.


Stick them in an oven, preheated to 350 degrees. Bake for about 25 minutes. Let cool in pans on a cooling rack for 5 minutes, then run a small spatula around the inside of the pan and turn the cake out onto the cooling rack. Cool completely.


Then you can make the frosting.

Cream butter and cream cheese until combined.

Mix in the vanilla extract.

Add the powdered sugar, one cup at a time.

Stir in about a tablespoon of milk (if you want a thinner frosting).

It should look about like this...except you could clean your bowl up a bit!


Then you can frost the cake.


You could leave it just like this...


... or add some toasted pecans to the sides!

*** Trick for toasting nuts***
Place nuts on a cookie sheet. Put the cookie sheet in the oven. (The oven should not be on yet.) Set the oven to 350 degrees. When the oven is preheated, check the nuts. They should be close to toasty! My oven takes 6 minutes to preheat, and I have found that they need about 1 minute more.

The credit for this trick goes to my mom. Who is a wonderful cook, but for some reason always forgets about nuts as she is toasting them!


Okay, now eat that cake!!


We certainly enjoyed it!


My mom and her Mother's Day cake!


I think this looks like a good Mother's Day - flowers, Starbucks, and cake!


Recipe time!

2 cups sugar
1/2 cup butter
2 egg yolks
2 cups flour
1 tsp baking soda
1 cup buttermilk
1 tsp vanilla extract
1 tsp butter extract
1 tsp coconut extract
1/2 cup chopped pecans
6 egg whites (at room temperature)

Cream Cheese Icing:
2 Tbs butter
8 oz 1/3 less fat cream cheese
1 lb. powdered sugar (about 4 cups)
1 tsp vanilla extract
1 Tbs milk (optional)

1 cup toasted pecans (optional)


Coat bottoms of 2 (9-inch) round cake pans with cooking spray (do not coat sides of pans); line bottoms of pans with wax paper. Coat wax paper with cooking spray, and dust with flour; set aside.

Combine sugar and butter in a large bowl; beat at medium speed of a mixer until well-blended. Add egg yolks, 1 at a time, beating well after each addition. Combine 2 cups flour and baking soda; stir well. Add flour mixture to creamed mixture alternately with buttermilk, beginning and ending with flour mixture. Stir in pecans and extracts.

Beat egg whites at high speed of a mixer until stiff peaks form (do not overbeat). Fold egg whites into batter; pour batter into prepared pans. Bake at 350° for 25 minutes. Let cool in pans 5 minutes on a wire rack. Loosen cake layers from sides of pans using a narrow metal spatula, and turn out onto wire racks. Peel off wax paper, and let cool completely.

Place 1 cake layer on a plate, and spread with 2/3 cup Cream Cheese Icing; top with another cake layer. Spread remaining icing over cake. Top with toasted pecans.


Wednesday, May 2, 2012

Hi Mom!

This is a test to see if my mother really reads my blog!*

Mom -- If you see this and contact me within 48 hours, you earn the privilege of choosing a treat to be made specially for you (by me, your one and only daughter) on Mothers Day!! If you do not contact me in time, you will receive a treat made kinda specially for someone (by the bakers at Copps or Trigs) sometime close to Mothers Day.

*Of course I know that my Mom reads my blog. She is fabulous, and I love her very much. I just thought she would enjoy this...right, Mom? :)

Tuesday, April 24, 2012

Mateo's First Communion


I was asked to make a lemon poppyseed cake for my cousin Mateo's First Communion. I made a cross-shaped cake that featured a mini Mateo! I sculpted him using tootsie rolls and fondant. I really liked the consistency of the tootsie rolls. They are much easier to work with than just fondant, sturdier, and tastier too!


I know that I am not the best at scuplting figures. But hey, I'm getting better! In fact, if you squint a little, and turn your head a bit to the left, it looks just like him!!

Congratulations Mateo!
God Bless You!

Sunday, April 1, 2012

Pumpkin Cinnamon Rolls

Every once in a while, I feel the need to treat my family to some Pumpkin Cinnamon Rolls. I originally got this recipe from a Cooking Light cookbook, and it is now one of my absolute favorites! The pumpkin adds a nice depth of flavor as well as a beautiful color. They are perfect for a fall or winter morning...or spring...or summer!


This is how it's done:

Dissolve one packet of yeast in warm water. Let it hang out for 5 minutes.


Add 3 cups of flour, pumpkin, melted butter, milk, 1 Tbs. sugar, salt, and nutmeg.


You are going to want to use your bread hook attachment for this.
Mix on medium speed until smooth.


Turn dough out onto a lightly floured surface. Incorporate remaining 3/4 cup of flour (1 Tbs. at a time) while kneading. Knead until dough is smooth and elastic. (The recipe states that this is supposed to take about 10 minutes. I have found that it takes me a few minutes longer, most likely due to my lack of arm strength!)


Coat a large bowl with cooking spray. Place the dough in the bowl, and turn over to coat the top. Cover and let rise in a warm place for 45 minutes, or until doubled in size. You can test this by pressing two fingers into the dough. If the indentation remains, it is ready!


Meanwhile, let's make the filling! Mix together the sugars, flour, and cinnamon.

Cut in 2 Tbs. of butter. You can do this with a wonderful pastry blender like mine, or use some knives, or your fingers -- wash first please!!! Set aside and go check on the dough.


After it has risen enough, punch down the dough.


It should look like this. Let it sit for 5 minutes.


Now for the fun part! Place dough on a lightly floured surface. Roll into a shape that closely resembles a 12x10 inch rectangle.


Spread the filling on top of the dough. Go all the way to the edge of the dough so each bite is equally yummy.


Roll tightly, starting from the long edge. Try to roll as tightly as you can! Pinch the edge to seal.


Use a serrated knife to slice into 12 pieces.


Place those slices, cut side up, in a 9 inch square pan coated with cooking spray.


Yummmm!!!
Now Cover and let rise 25 minutes, or until doubled in size.


Yes, those are ready now!


Bake in an oven preheated to 375 degrees for 20 minutes.


Now the hard part. Let cool in a wire rack for 15 long, deliciously smelling minutes.
While you are waiting, you can prepare the glaze. Apparently I was too distracted by the smell to remember to document the glaze-making process!


Drizzle glaze over the cinnamon rolls.


Now it is time to devour!!!


Pumpkin Cinnamon Rolls

Dough:
1 package of dry yeast
1/4 cup warm water (100-110 degrees)
3 3/4 cup flour, divided
1/2 cup pumpkin
1/2 cup milk
1/4 cup butter, melted
1 Tbs sugar
1 1/4 tsp salt
1/4 tsp nutmeg

Filling:
3 Tbs granulated sugar
3 Tbs brown sugar
2 Tbs flour
1 1/2 tsp cinnamon
2 Tbs butter

Glaze:
3/4 cup powdered sugar
1 Tbs hot water
1/4 tsp vanilla extract


 Dissolve yeast in warm water in a large bowl; let stand for 5 minutes. Lightly spoon flour into dry measuring cups, and level with a knife. Add 3 cups flour, pumpkin, milk, butter, salt, and nutmeg. Mix at medium speed of a mixer, using the hook attachment, until smooth. Turn dough out onto a lightly floured surface. Knead until smooth and elastic (about 10 minutes), incorporating remaining flour 1 Tbs at a time to keep dough from sticking to your hands. Place in a large bowl, coated with cooking spray, turning to coat the top. cover and let rise in a warm place for 45 minutes, or until it is doubled in size.

Combine sugar, brown sugar, flour, and cinnamon in a medium bowl. cut in 2 Tbs of butter until the mixture resembles coarse meal. (whatever that means -- use your judgement!)

Punch dough down. Let sit for 5 minutes. Place dough on a lightly floured surface. Roll into a 12x10 inch rectangle. Spread filling onto the dough. Roll up the dough tightly, beginning with the long end. Pinch the edge to seal. Slice the dough into 12 equalish parts. Place the slices cut side down in a 9 inch square baking dish coated with cooking spray. Cover and let rise 25 minutes, or until doubled in size.

Preheat oven to 375.

Bake at 375 for 20 minutes, or until golden.

Let cool on a wire rack for 15 minutes.

Combine powdered sugar, water, and vanilla in a small bowl. Drizzle over the top of the rolls.

Enjoy!


Saturday, March 17, 2012

Cake Batter Puppy Chow

If you have a serious sweet tooth, you have to try cake batter puppy chow! It's like licking the beater and the frosting spatula at the same time!


Okay, so we didn't really follow a recipe, so you may need to adjust the amounts a bit!

8 cups Chex Cereal
I block of almond bark (yes, I know a "block" doesn't tell you much, but it doesn't have to be exact.)
1 box cake mix - I highly recommend funfetti
1 or 2 cups powdered sugar


Step 1: Melt the almond bark. Use a double boiler or the microwave on half-power for 30 seconds to 1 minute at a time. (Be careful to not allow any water into the almond bark or it will seize and ruin your day.) The hardest part is breaking it into chunks. Use those muscles!
Step 2: Measure out the Chex into a large bowl.


Step 3: Pour melted almond bark over Chex.


Step 4: Mix!


Don't feel bad if you can't mix as crazy fast as Breanna. She must have been practicing for her close-up!


Step 5: Dump into a zip-top bag. Add powdered sugar and cake mix to the bag.

Okay, not the best picture. That is what we're doing though!

Step 6: Shake it!


Now doesn't that look like fun?


Step 7: Remove puppy chow from excess powdered sugar. This seems like it should be a fairly simple task, and we found there are two ways you could do it:

Use a slotted spoon to scoop it out like Mikala,


Or use a strainer over a garbage bag like me!


Step 8: Devour! (I would recommend having a large glass of milk nearby!)